 Merch
Merch Medical card
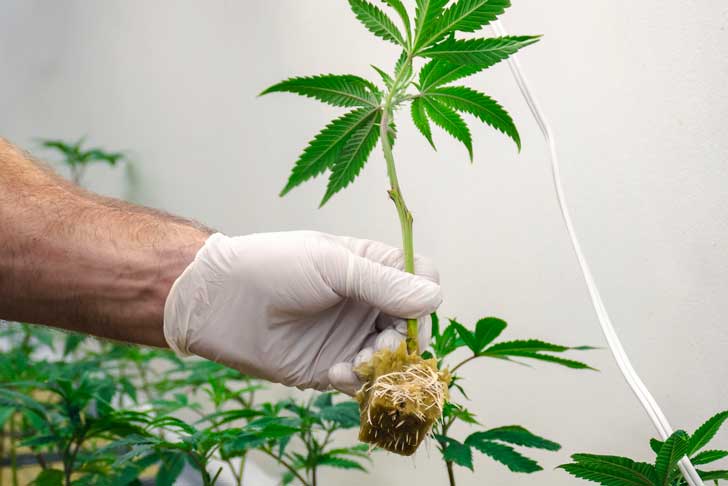
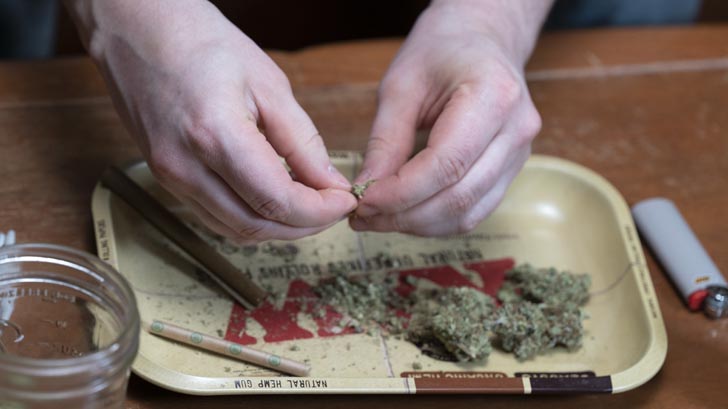
Growing cannabis with feminized seeds can produce excellent results, but seeds are, by their nature, unreliable. No matter how stellar a seed bank’s reputation, there’s no way to know for sure what phenotype different seeds will express. Luckily, there is a way for cannabis growers to take all of the guesswork out of cultivation: cannabis clones.
➤ Easily grow your own cannabis at home. All you need is seeds.
No, this isn’t something out of a sci-fi novel. In fact, cloning is an indispensable part of commercial cannabis cultivation. Although mastering cannabis cloning takes a bit of practice, no cultivator will regret adding this technique to their skillset.
What is a cannabis clone?
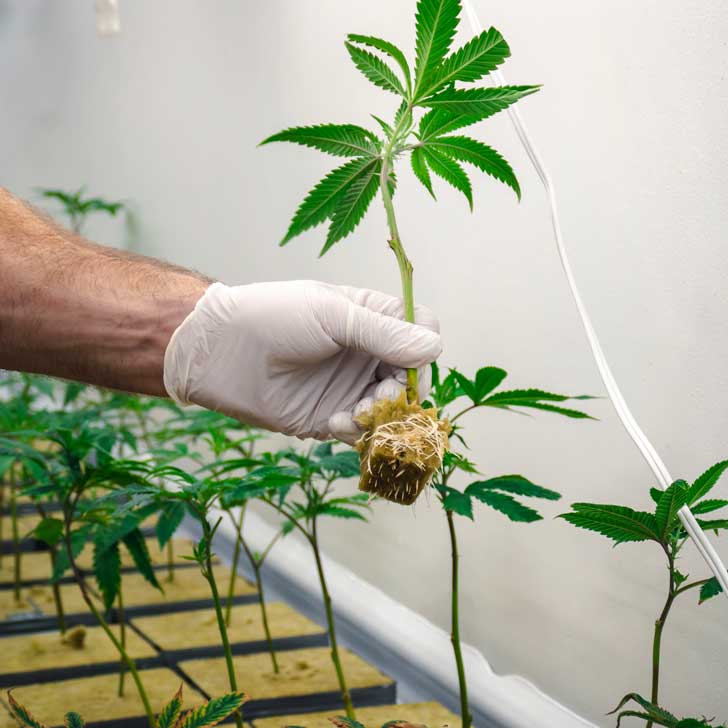
A cannabis clone is exactly what it sounds like — a genetic copy of an existing cannabis plant. To create a clone, the grower will snip off a branch (aka “a cutting”) from a female plant that has proven to be a worthy mother plant and then put it in a growing medium to help encourage root development.
Once the clone’s roots are strong enough, it can be transplanted into soil and will continue to grow and develop just like the original marijuana plant. You will soon notice this clone expressing the same traits as its mother plant.
Why would anyone want to clone cannabis?
You may be wondering why people would go through all the trouble of clipping and cloning a cannabis plant. After all, isn’t it more “natural” to start with high quality seeds?
While seed propagation may be in line with Mother Nature, there are many advantages to cloning a mother plant. Most significantly, marijuana clones are more reliable than seeds. Since these clones are genetic copies of the original mother plant, cultivators know what to expect in terms of potency, appearance, sex, and growing pattern. Using clones from healthy mother plants takes a lot of the guesswork out of growing. [Note: even clones of a female mother can actually turn into hermaphrodites when put under too much stress — rare, but worth noting.]
In addition to reliability, clones are cheaper than seeds. Instead of investing in a batch of seeds that may or may not germinate, you can clip clones for free. Plus, clones don’t have to go through a germination or seedling stage, which significantly cuts down on growing time.
What should growers look for in a mother plant?
The mother plant is the cannabis plant from which you will take a clipping. Since your clones will share your mother plant’s genome, you must choose the highest quality cannabis in your garden. If you select a sickly strain, it will be impossible to remove those undesirable traits from your clones.
Let’s go over a few ground rules that must be followed to make sure your clones will become strong and potent plants.
- Make sure your mother plant is indeed a mother.
Too many beginners have made the mistake of cloning a plant too early, only to find out that they actually cloned a male plant. The easiest way to check the sex of your plants is to scan the nodes between your plant’s stalk and branches. Female plants will always have long hair-like structures known as “stigma.” Unsurprisingly, male plants will have “balls” of pollen. Hermaphrodites will have both stigma and pollen sacs.
- Never use a mother plant that was grown from feminized seeds.
While feminized seeds are fantastic for growers that don’t want to deal with male plants pollinating their crop, they’re terrible for prospective clones. Plants that were grown from feminized seeds have a higher chance of turning into hermaphrodites when they are stressed. The constant pruning and long vegetative cycle (more on that later) put a lot of stress on your mother plant and you want to make sure you have a plant that is as stress-resistant as possible.
- Make sure you’re choosing a strong and healthy plant as your prospective mother plant.
High-quality mother plants should have a healthy, robust appearance compared with other plants. A mother plant should also show no signs of nutrient deficiencies, mold, or pest infestations. Keep in mind that you will be making dozens if not thousands of genetic copies of this one plant and any negative or positive trait will be replicated in those clones.
- Know what you’re growing
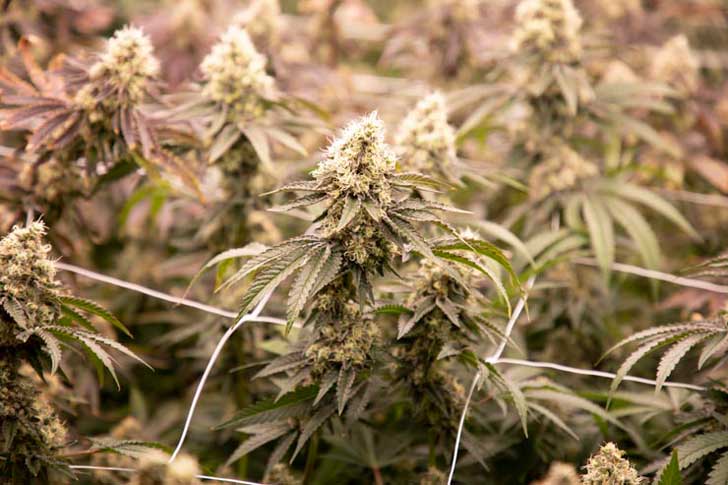
Before you decide which plant to clone, make sure you know the quality of the bud your mother can supply. If you’re not 100% sure that your mother plant is a champion, make sure that it has gone through a flowering cycle and you were able to test the quality and potency of the bud it produces. If you absolutely want to save the time of doing so, you could get a rough idea of the bud your plant might produce by sniffing your strain. Typically, plants with an intense aroma will produce more resinous buds.
- Consider your strain’s height before choosing a mother plant.
If you’re growing in cramped quarters, you should ensure your clones will reliably fit your grow space.
When should you take cuttings?
Typically, the first cuttings are taken from the mother plant after it has been in the vegetative phase for about two to three months. You could technically also cut a clone during the flowering phase, but most marijuana growers recommend working with vegetative plants. Mother plants are typically pruned regularly and kept in the vegetative phase by exposing them to at least 18 hours of light per day.
Whenever you take a clone from your mother plant, the cutting will be in the same growth stage. So, if you take a clone from a flowering plant, you will have to bring it back into the vegetative stage by adjusting the light cycle, which exposes the plant to unnecessary stress. A clone from a flowering plant will also take longer to develop strong roots compared to a clone from a vegetative plant. Clipping clones from a flowering strain could also interfere with the mother plant’s bud production.
Especially if it’s your first time cloning a cannabis plant, you’ll have a much higher success rate if you take clones from a vegetative plant.
What equipment do you need to cut clones?
Now that you know the basics of choosing a mother plant, it’s time to gather your cloning gear. Here are the main items you should have in your toolkit before you start cloning:
- A sharp razor, scalpel, or pair of scissors
- Starter cubes (preferably Rockwool)
- T5 or CFL fluorescent lights
- Rooting hormones
- Disinfectant wipes (e.g., isopropyl alcohol swabs)
- Gloves
- Sterile glass cup(s)
- pH scanner
- Hygrometer
- 5.5 – 6.5 pH filtered or spring water
- Spray bottle
- Humidity dome
- Heat mat (optional)
Note: the importance of cleanliness throughout the cloning process cannot be overstressed. If you don’t take the time to sterilize your tools, workspace, and hands, there’s a high chance your clones will pick up a nasty disease. Now is the time to let your inner germaphobe go crazy.
What’s the best rooting medium for clones?
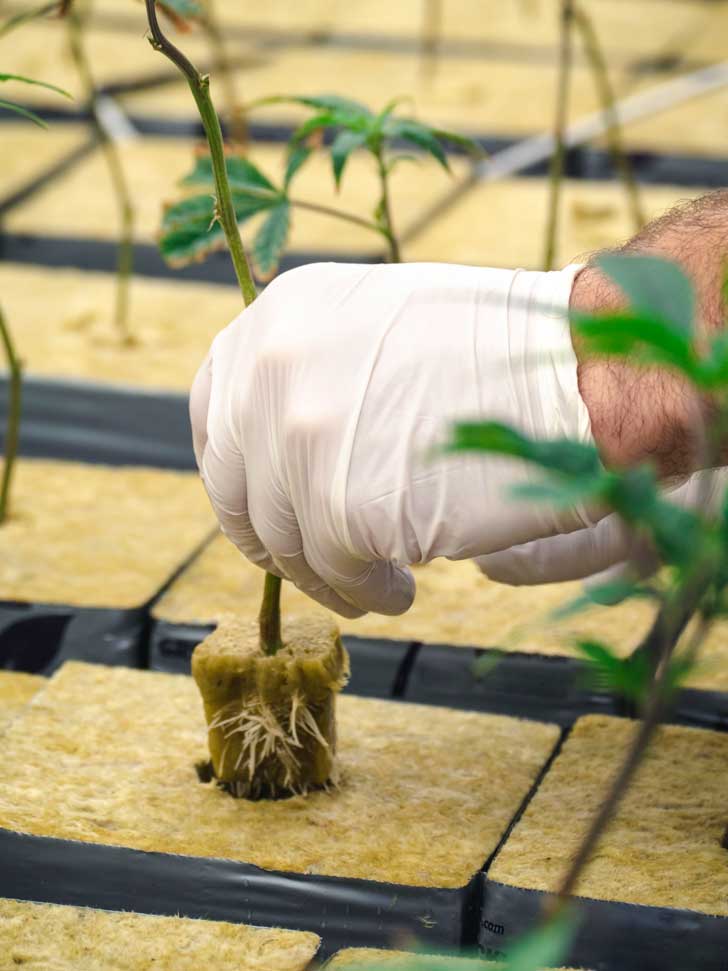
The three most popular mediums you could place your clones in are Rockwool cubes, water, or soil. Although roots should form in any of these containers, most cultivators recommend using Rockwool.
Since Rockwool is an inert medium, you don’t have to worry about extra nutrients overburdening your delicate clones. Rockwool cubes also provide phenomenal aeration and water retention. Plus, you could easily track your clone’s root development by peeking on the sides of Rockwool cubes.
The only real downside associated with Rockwool cubes is that they require extra prep work. Remember to soak your Rockwool cubes in 5.5 pH water for at least two hours before using them.
So, what’s so bad about using water or soil? Well, there’s nothing “wrong” with using these materials, but they aren’t as user-friendly as Rockwool.
Even though it’s uber-easy to plop your clones in water, there’s a risk for algae contamination if you’re not careful. If you’re not using high-quality filtered or spring water, there’s also a chance your water could have harmful compounds like chlorine. Lastly, many growers complain it takes longer for roots to develop in water versus Rockwool.
In the case of soil, it’s more difficult to assess your clone’s root development after you plant your clippings. You also must ensure you’re using a non-fertilized, low-nutrient-dense soil. If you use a fertilized soil, there’s a high chance your clones won’t make it.
How do you choose the best clone cutting?
Once you’ve decided what mother plant you want to use, it’s time to choose the ideal branch for your cutting. For the best results, focus on branches near the bottom of the plant that show signs of new growth.
There’s no “ideal length” for a cannabis cutting, but most cultivators say your cutting should measure at least 3 inches. It’s also a good idea to cut a branch with at least three nodes.
What’s the best way to take a clone?
Before you start hacking away at your clone, double-check all of your tools have been thoroughly sterilized. It would also help if you had everything for your cloning operation nearby so you’re not fumbling with your clippings.
There are many different techniques for taking a clone, but most involve slicing your chosen branch a few millimeters under the lowest node at a 45° angle. The reason growers are so keen on cutting at this angle is to maximize the surface area, making it easier for roots to form.
If you want to go extreme, you could bust out an Exacto knife and make a tiny slice through the middle of your stem. While it’s not necessary, this added step could add even more surface area to your clone, thus speeding up root development.
Keep in mind that when you cut a branch, air pockets could form in your cuttings. To minimize this risk, have a few glasses with pH-corrected water nearby to put your clippings in.
After applying rooting hormones (they come as a powder, liquid, or gel) to your cutting and placing the clones in your preferred medium, it’s best to chop off the lowest leaves and cut the ends off of the topmost leaves. These simple steps will help your plant redirect its energy towards building a healthy root structure.
Taking care of baby clones
Clones perform best in warm, humid environments, which explains why growers recommend using a humidity dome and a heating pad. During the first 48 hours, clones thrive in an environment with 90 – 95% humidity. After two days, you could dial the humidity back to the 80% range. As for temperature, it’s best to keep your room in the mid-70s Fahrenheit.
Humidity domes also help you track how much water your plants are getting. Whenever you notice the humidity dipping below the recommended levels, spray a bit of non-chlorinated water.
If you’re not using a humidity dome, you should mist your clones a few times per day. However, it’s best to place a “DIY dome” over your clones if you’re leaving home for a long time. See if you have any clear, plastic containers on-hand to help retain humidity while you’re at work — and remember to clean and sterilize vigorously before use.
In terms of lighting, it’s best to use low-intensity fluorescent lights like CFL or T5s. While it’s never recommended you use HIDs, you could experiment with 400W models as long as they’re far from your clones. Growers often keep their lights on for 18-19 hours per day.
How long does it take for clones to grow roots?
There’s no set time for how long it takes for clones to develop roots, but most strains take about 1-2 weeks. However, even if you don’t use tricks like the humidity dome or rooting hormones, you should notice roots at some point — even if it takes a few months.

How do you transplant clones?
Once you notice roots sticking out at least 3 cm in your clone’s growing medium, it’s time to get transplanting. But before you get too excited, please remember to sanitize everything. Just like when you took your first clipping, you need to ensure your work area is 100% sterile.
For the best results, wear gloves throughout the entire transplanting procedure. Also, handle your clone with extreme care, just as if it were a seedling.
First, water your soil ahead of time and let the excess water drain. Next, make a hole in the soil that’s large enough to completely cover your clone’s roots (typically ~1 inch). Now, carefully pull your clone out of its medium and cover the roots in your soil.
Final tip: Don’t fear moldy mistakes
Anyone new to cloning shouldn’t beat themselves up if a few clones die in the process. Indeed, it’s quite common for experienced growers to lose some clones from their mother plant. For the best results, take as many cuttings as you could comfortably fit in your grow space. The more clones you have, the better chance there’ll be a few that succeed.
It’s also essential to scan your clones for mold or disease throughout the root-growing process. Because clones need a humid environment to thrive, it’s common for mold to build in these areas. Whenever you spot a sign of mold infestation, remove the diseased plants as quickly as possible.
With practice and persistence, you should be cloning like a pro in no time.


Sign up for bi-weekly updates, packed full of cannabis education, recipes, and tips. Your inbox will love it.